Clock Education

Home > All Posts > devops > 2020 January, 28 >
2 min read
Upgrade Windows Subsystem Linux - Ubuntu 18.04 to Ubuntu 19.10
In this guide I'm going to detail upgrading a Windows Subsystem Linux (WSL) Ubuntu install from the current version 18.04 to 19.10 this is an intermediary release before Ubuntu 20.04 is released on 2020 April 23.
I have documented this process in the past for moving from Ubuntu version 18.04 to 18.10. You can see my comments as I went through the process back then.
📺 Here's a video detailing the process.
Check the current Ubuntu version
Ok, to check the current installed version of Ubuntu from the terminal
I enter lsb_release -a to get the currently installed Ubuntu version
displayed.
LSB stands for Linux Standard Base and the '-a' is for 'all information'
1lsb_release -a
The output looks like this:
Do the release upgrade!
To start the upgrade I enter the terminal command
do-release-upgrade.
1sudo do-release-upgrade
This will prompt me if my release-upgrades file isn't set to
normal.
Set release upgrades to normal
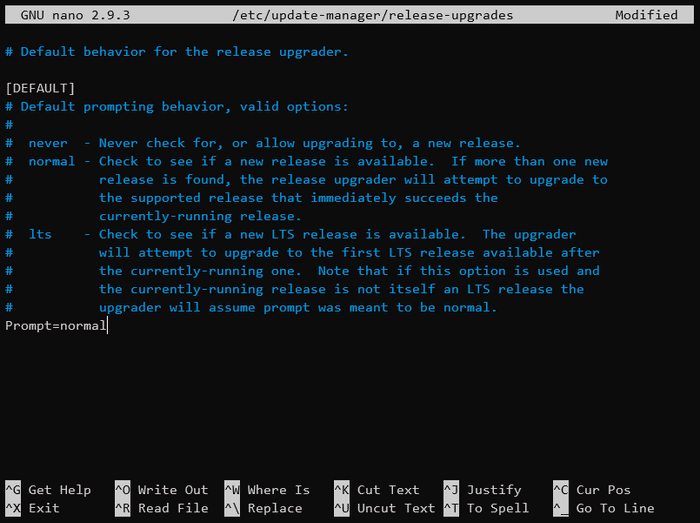
Open the release-upgrades file path to edit, in this example I'm
using Nano to edit the file.
1sudo nano /etc/update-manager/release-upgrades
In the file I change the Prompt from Prompt=lts to
Prompt=normal.
To save the file in Nano I use Ctrl+o to write out the file, confirm (Enter/Return) then to close use I Ctrl+x.
Do the release upgrade, for realsies
Now the release-upgrades file is set to normal I can do the
do-release-upgrade.
You may be aware of an lxd error that occurs on the Ubuntu 18.04 to Ubuntu 18.10 upgrade. This is where there is a prompt saying "Your system is unable to reach the snap store".
I'm going to skip this during the upgrade but you can optionally run this when doing this for yourself, here's the command:
1sudo dpkg --force depends -P lxd; sudo dpkg --force depends -P lxd-client
Pick the same command again in the terminal, if I arrow up a a couple of commands I can use it again.
1sudo do-release-upgrade
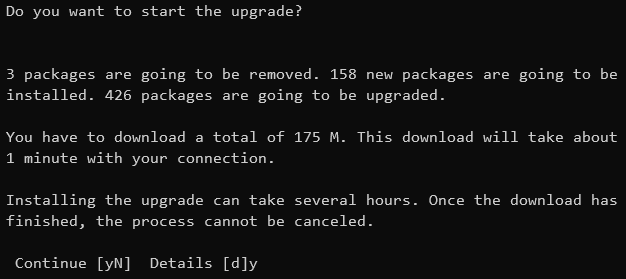
I'm now prompted with the details of what is going to happen in the upgrade:
I respond with y to continue and start the upgrade.
Warnings and configs
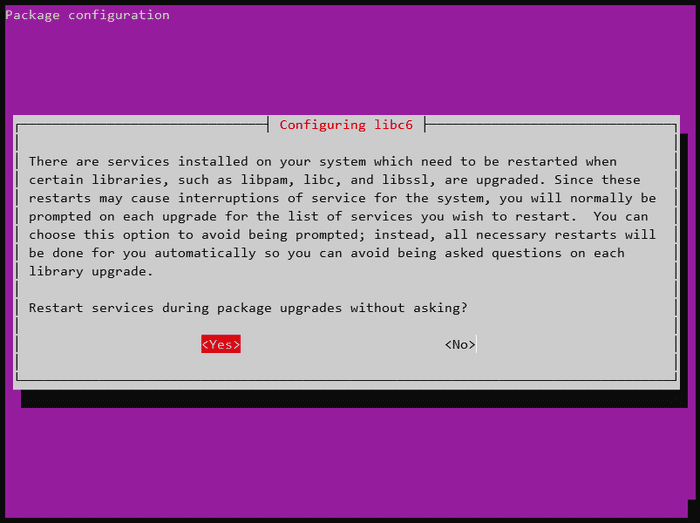
When I'm prompted about libc6 for restarting services during package
upgrades I use the tab key to select <Yes> then return to continue.
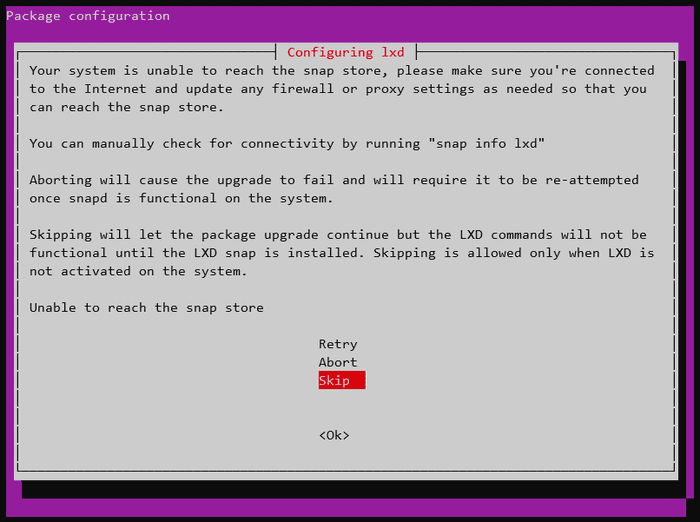
Next I have the Lxd warning I mentioned earlier, in this case I'm
going to arrow down and select the option to <Skip> then hit return
to continue.
In the following screens I'm being asked about package configuration,
I'm going to be picking the option to
install the package maintainer's version for all of them.
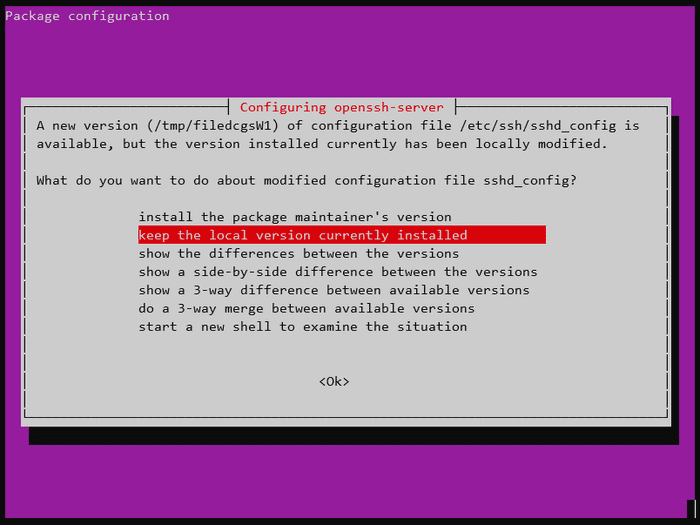
Same with openssh-server arrow up key to to
install the package maintainer's version and hit return to continue.
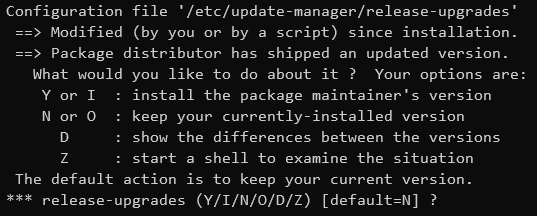
Then there's the release-upgrades configuration and yeah I'm going
to select to install the package maintainer's version and confirm to
continue.
Finish up install
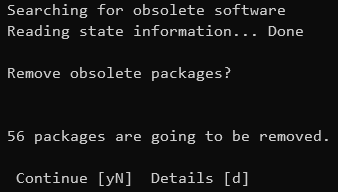
One of the last few prompts is to confirm the removal of the obsolete
packages, confirm y to continue.
Restart is required now, so I confirm with y.
Now I have the confirmation that the do release upgrade completed successfully. I press Ctrl+c
Then have to press x to destroy!
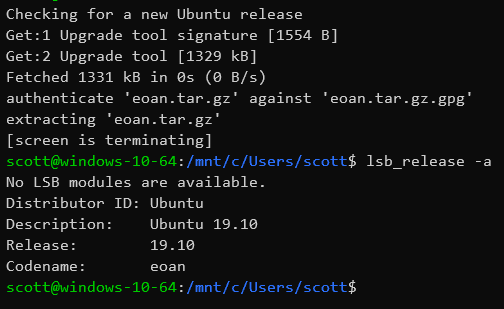
That takes me back to the regular prompt where I can check with
lsb_release -a what version I'm now on.
Confirmation the Windows Subsystem Linux version of Ubuntu I'm using is now on 19.10.
Wrap up!
That's it! I upgraded a WSL Ubuntu version from 18.04 to 19.10.
First, I changed the default behaviour of the release upgrader from
lts to normal.
Then do-release-upgrade, and I skipped the Lxd configuration. It
isn't needed on WSL but is part of the Ubuntu image on the Microsoft
Store 🤔
I accept install the package maintainer's version on any
configuration prompts.
Done.
Thanks for reading 🙏
Please take a look at my other content if you enjoyed this.
Follow me on Twitter or Ask Me Anything on GitHub.
Related Posts


